Showing posts with label DIY. Show all posts

Tuesday, November 18, 2014

Stylish Tuesday with Co-Host Dressed 2 DNines!

Happy Tuesday Dolls!
First and foremost THANK Y'ALL for such a warm welcoming back to the blog community! 

I vaguely mentioned my love for easy, DIY Halloween costumes last week on the blog so today I'm going to dive more into that category. I know we have a whole year before it's time to get decked out in our best costumes, but maybe you can wear some of these throughout the year? Doubtful ... but it makes me feel a little better about this post! 


Minnie Mouse
Obviously my sister and I dressed like Minnie for Mickey's "Not So Scary" Halloween party but I was this close to re-wearing the tutu and ears with black heels and a tight black tank on actual Halloween night! Add a little black to my nose and I think it would have worked out great!
Walk of Shame
Probably my favorite DIY Halloween costume to date. Since I had a pair of guys boxers lying around I asked one of my guy friends for one of his button up shirts (tip: get one with a pocket so you can throw your phone, ID and debit card in there rather than take out a bag!) I added an obscene amount of jewelry, paired it with some heels and literally "roughed" up my hair to complete the look 
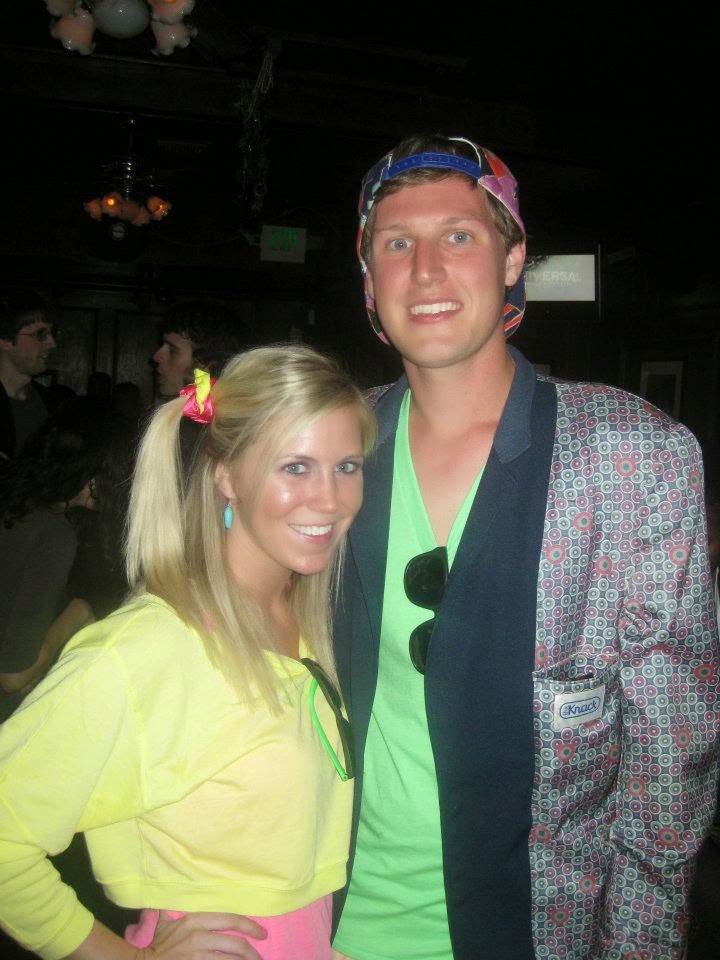
90's 
Probably one of the most simple costumes to date. Grab a colorful tank, some colored Soffee shorts (don't act like you don't still have a pair lying around!) Pair it with a crop top sweatshirt or tank, a side ponytail and some funky glasses and you're ready to party!
Navy Nancy, GI Jane and a Cat

This is what I threw together 2 years ago. I had a striped dress from Target which I just added some gold accessories to. I threw on a captain's hat which I had bought for a pub crawl a couple months prior and BAM Navy Nancy was born!

Morgs literally threw her combat boots on with black shorts, white tank and a dog tag necklace to create GI Jane. For some reason she had a matching set camo beer coozie belt and hat which honestly made the outfit in my opinion!

Liz was a traditional sexy class with black tights, a body suit and ears ... duh!
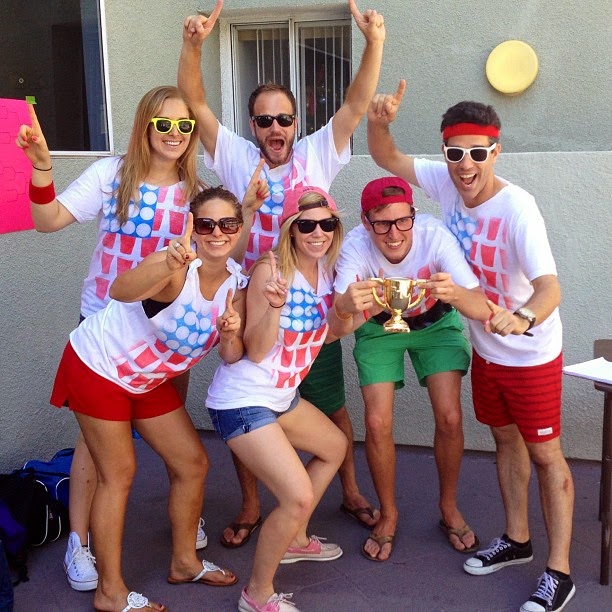
Drinking Team of Champions
So this one wasn't exactly a Halloween costume, but it would do the trick! I got those shirts in the boys section at Target last Labor Day for $5 each! We ended up using them for our team Beer Olympic shirts but this would be an amazing group costume on the cheap!

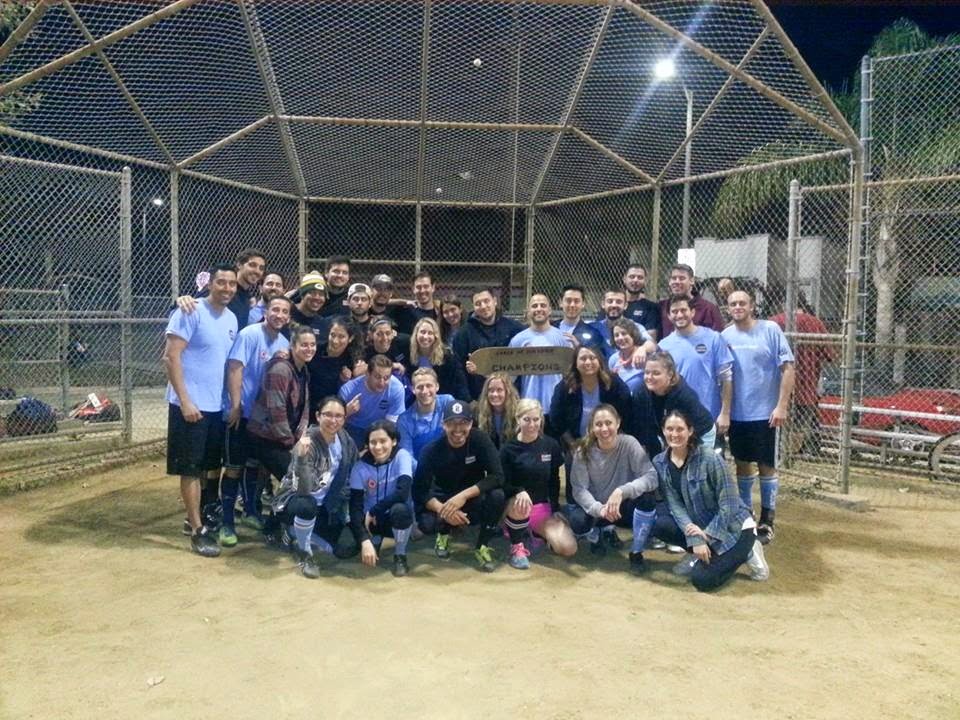
On a completely different side note, my kickball team in the CA Dogtown league ended up beating the #1 seed in the semi finals which advanced us to the Championship! We ended up losing, but it was such a fun time playing in a finals game that I had to share! 

- now to the link up - 

Hosted by
Life's A Party Dress Like It                                        Dress 2 DNines

If you'd like to co-host Stylish Tuesday, please send an email to lifesapartydli@gmail.com!

1. Please follow me via Bloglovin' or GFC and my co-host Dressed 2 DNines on Bloglovin'!

2. Link up your favorite recent style post

Life's A Party Dress Like It


Tuesday, June 3, 2014

DIY Vanity + Stylish Tuesday!

Happy Tuesday Dolls! 

We're switching things up today and doing a completely different type of post. Normally every Tuesday is strictly fashion related, but I just completed my latest DIY project and can't fight the urge to share it any longer! Let me introduce to you my brand spankin' new vanity desk!
The one and only con of my new place is that I literally have NO bathroom storage. Since I have the guest room, I also have the guest bathroom and I know that whenever someone comes over the last thing they want to see is all of my makeup, perfume and toiletries all over the counter.

This got me thinking about what I could do to make the most of my bedroom space, but still have a place to get ready or at the very least sit and put my shoes on. I immediately went to my trusted Pinterest and typed in "make up vanity." I knew I wanted a desk where I could easily see all of my make up but didn't know exactly how that was going to pan out.

A lot of the photos were ok, but then I hit the gold mine! I can't take credit for this idea since I stole it from Ms Tapioka; however, I did put my own twist on it and I have to say I love how it turned out. 


Dr. D obviously was my handyman and did all of the grunt work, but I accessorized, organized and made the vanity truly my own. The main desk shelf has unfortunately been discontinued from IKEA, but this wouldn't be hard to duplicate in the least! All of the containers are from The Container Store and I'll have it labeled below what they're each called. 

As soon as the desk was finished I was on a mission to find the perfect stool and mirror. My closet is directly to the left of the vanity and both doors are full length mirrors, but I still wanted to have one directly in front of my face for when I'd be doing my make up. I ended up finding the perfect mirror and adorable paisley stool at Marshalls for a steal!  
Mirror: $24.99   Stool: $49.99

I absolutely love getting ready now because everything is so accessible, but I must admit my favorite part is being able to see right through the glass shelf and knowing what make up I'm running low on, or what I have way too much of - I'm guilty of owning 3 compacts and having no idea!
Pardon the cords and white bin - still looking for something nice to hold my make up bags, curling iron, straightener and blow dryer!
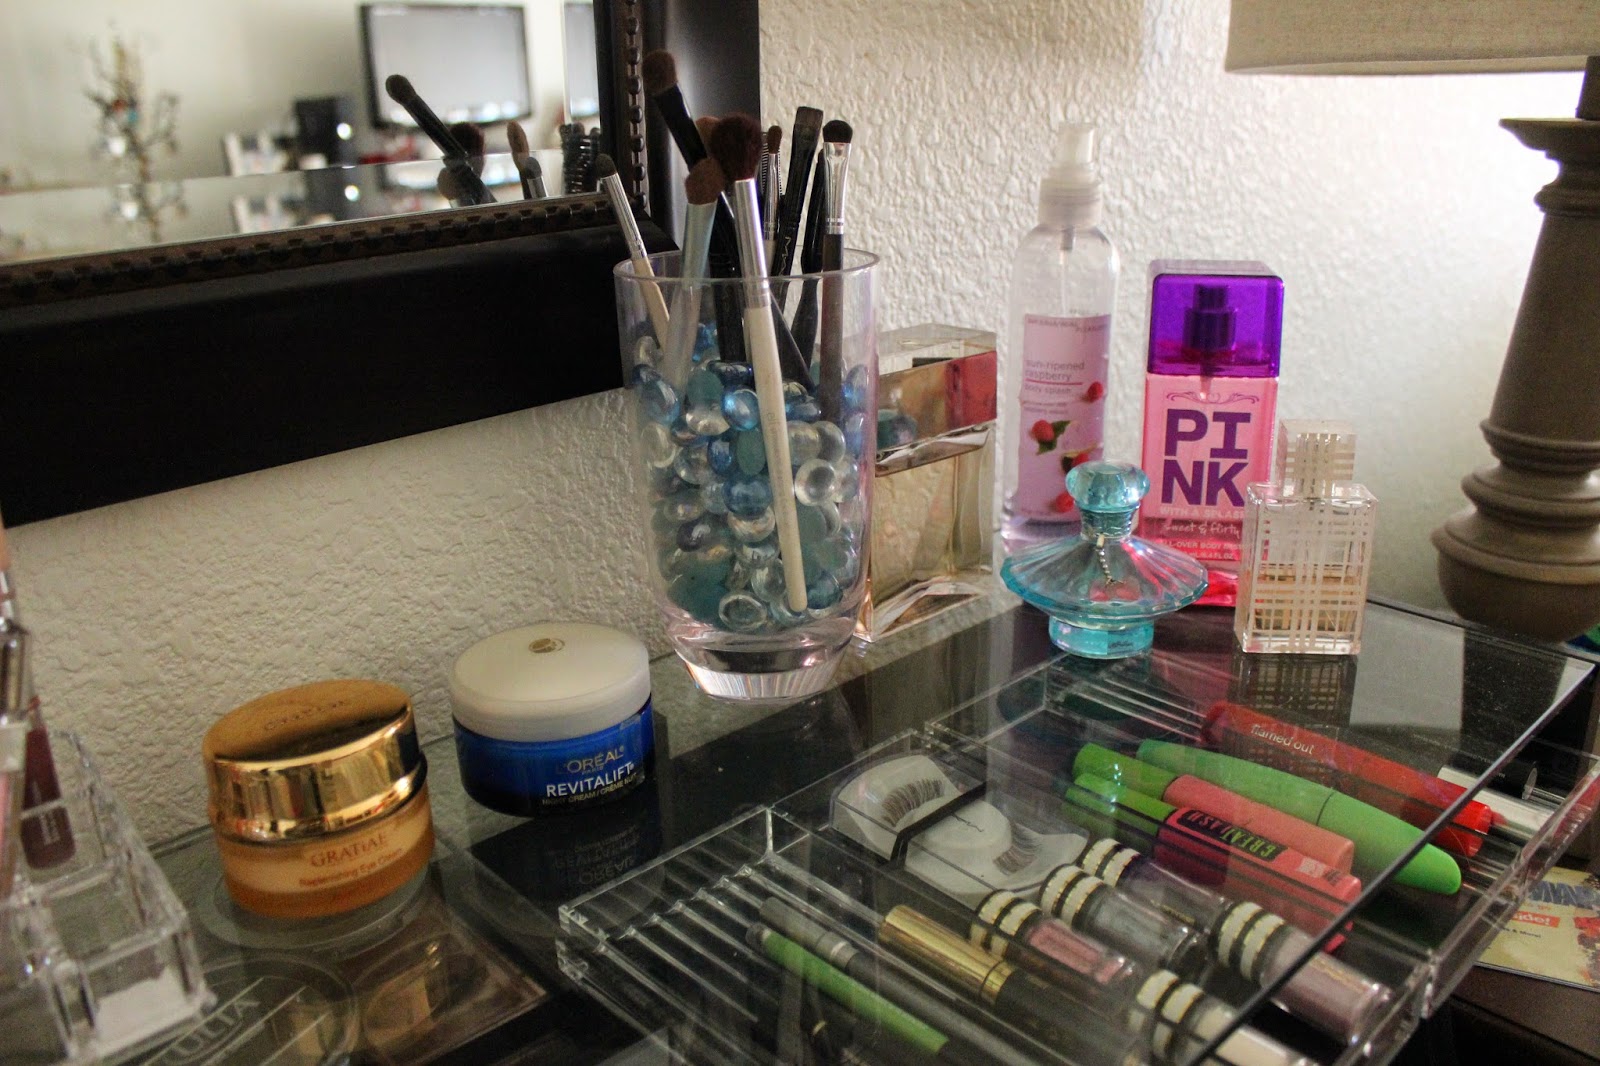
I got the cups and beads which hold my make up brushes at the dollar store!
The large bins on the left are two food storage containers which I found in the kitchen section of The Container Store. They're perfect to hold all of my nail polishes, make up remover wipes, face moisturizers, deodorant (yes I wear men's and I'm not ashamed!) and dry shampoo.
Top left: Food Storage Bins - $9.99 each // Top Right: Large Acrylic Trays - $14.99 //  Bottom Right: Flat Lipstick Tray - $6.99 // Bottom Right: Eyeliner Trays -$6.99 // Left Middle: Angled Lipstick Tray: $7.99

The long acrylic trays are pretty standard, but since the opening is less than an inch wide it was hard to find a container that would fit. I really didn't want to pay $15 per tray, but hey it looks great! The smaller trays are wonderful because they have little groves for each individual pencil and eyeliner stick!

IKEA DESK ASSEMBLY
Ikea Shelf (discontinued) -$19.99 // Ikea Lalle Legs - $12.50 // Triangle Shelf Support - $3.99
 I put the legs on the front (obviously) which left room for the triangle support shelves. I highly recommend these so you can put more weight on the shelf
Fully mounted to the wall 

I'm still SO obsessed with it! 

Do you have any DIY projects you're completely in love with?


Hosted by Life's A Party, Dress Like It & Pretty In Her Pearls
Life's A Party, Dress Like It (Follow on Bloglovin')       Pretty In Her Pearls (Follow on Bloglovin')

If you'd like to co-host Stylish Tuesday, please send an email to lifesapartydli@gmail.com!

This week's featured blogger is Londyn from Blog Fashion!
Can we just talk about how fabulous and chic she looks with her adorable baby bump?! The gold shift dress is great because it not only adds texture with the print, but has some stretch to it to not only keep her comfortable but looking incredibly sexy as well. I love how she paired the waist belt with it and added some fun studded heels! Awesome look love!

If you'd like to be featured on next week's Stylish Tuesday, then simply follow the rules below: 

1. Please follow me via Bloglovin' or GFC and this week's co-host Angela from Pretty In Her Pearls on Bloglovin'

2. Link up your favorite recent style post

Life's A Party Dress Like It

 Linking up with : Lauren, 

Tuesday, November 5, 2013

DIY Halloween

Hey Dolls!


Since November 1 hit Halloween has been LONG over and Christmas has been all that's on my mind!

But alas, I forgot to post my Halloween costumes so I do need to back trek a little as much as it pains me to. Since my work schedule has been beyond chaotic (Working 10 events in 3 weeks) I can barely keep my eyes open, let alone shop for a costume; therefore, I had to get creative.

A couple weeks pre-Halloween my kickball league had their end of season party ... I did the easiest DIY costume ever and went as Easy A.

Initially it was supposed to be "A" from Pretty Little Liars, but realized this was a much better choice.  I wore a short dress and taped a pink A on. BOOM! Easy A was created!

haloween 3halloween 2 - image via Jackrabittproductions.com -


Halloween night I went to a USC/UCLA grad student party with my roommate and our friend Liz on the Sunset Strip. During the day I thought about what I had at home and came up with this costume: Navy Nancy!
halloween
Blue & white striped dress, metallic gold boat shoes and a captain's hat to complete the look. Not only was it free, but it was insanely comfortable compared to wearing heels all night! Morgan went as G.I. Jane and Liz was Catwoman!


What were you for Halloween? I'd love to know/see a photo of your look :)


po coupon

Thanks for reading and be sure to follow on bloglovin'!


Follow on Bloglovin


Linking up with Shanna, The Pleated Poppy, My Girlish Whims, Karly, Lauren,

Thursday, August 1, 2013

DIY Fabric Corkboard

How to make a fabulous fabric covered bulletin board!


Step 1: You'll need fabric of your choice, a stapler, and a cork/bulletin board.
I scored this framed beauty at Hobby Lobby for half off!cork 1
Step 2: Lay out your fabric face down and place the cork board backing on top for a stencil
cork 2


Step 3: Cut a once inch border around your stencil
cork 3


Step 4: Start to wrap the fabric onto the back of your cork board.
Line it up with how you want the fabric to be displayed on the front
cork 4


Step 5: Once your fabric's lined up, make sure to pull the ends tight and fold them onto the back.
Staple the fabric to the backing as close to the edge as possible. This will ensure it stays tight.
cork 5


Step 6: Once you get to a corner you'll notice it will have extra fabric,
Cut this at an angle and staple the loose end to the board
cork 6


Step 7: Cut off the excess fabric, but make sure to leave a little bit left after the staple.
cork 7


Step 8: This is what your finished backing should look like
cork 8


Step 9: Place the cork board back into the frame and you're finished!
Add some decorative push pins or use stud earrings to place on your fabulous new board!
cork 9
I'm still debating what color I should paint the frame ... any thoughts?


Thanks for reading and be sure to follow me on bloglovin'!
signature


Follow on Bloglovin