Showing posts with label the container store. Show all posts

Tuesday, June 3, 2014

DIY Vanity + Stylish Tuesday!

Happy Tuesday Dolls! 

We're switching things up today and doing a completely different type of post. Normally every Tuesday is strictly fashion related, but I just completed my latest DIY project and can't fight the urge to share it any longer! Let me introduce to you my brand spankin' new vanity desk!
The one and only con of my new place is that I literally have NO bathroom storage. Since I have the guest room, I also have the guest bathroom and I know that whenever someone comes over the last thing they want to see is all of my makeup, perfume and toiletries all over the counter.

This got me thinking about what I could do to make the most of my bedroom space, but still have a place to get ready or at the very least sit and put my shoes on. I immediately went to my trusted Pinterest and typed in "make up vanity." I knew I wanted a desk where I could easily see all of my make up but didn't know exactly how that was going to pan out.

A lot of the photos were ok, but then I hit the gold mine! I can't take credit for this idea since I stole it from Ms Tapioka; however, I did put my own twist on it and I have to say I love how it turned out. 


Dr. D obviously was my handyman and did all of the grunt work, but I accessorized, organized and made the vanity truly my own. The main desk shelf has unfortunately been discontinued from IKEA, but this wouldn't be hard to duplicate in the least! All of the containers are from The Container Store and I'll have it labeled below what they're each called. 

As soon as the desk was finished I was on a mission to find the perfect stool and mirror. My closet is directly to the left of the vanity and both doors are full length mirrors, but I still wanted to have one directly in front of my face for when I'd be doing my make up. I ended up finding the perfect mirror and adorable paisley stool at Marshalls for a steal!  
Mirror: $24.99   Stool: $49.99

I absolutely love getting ready now because everything is so accessible, but I must admit my favorite part is being able to see right through the glass shelf and knowing what make up I'm running low on, or what I have way too much of - I'm guilty of owning 3 compacts and having no idea!
Pardon the cords and white bin - still looking for something nice to hold my make up bags, curling iron, straightener and blow dryer!
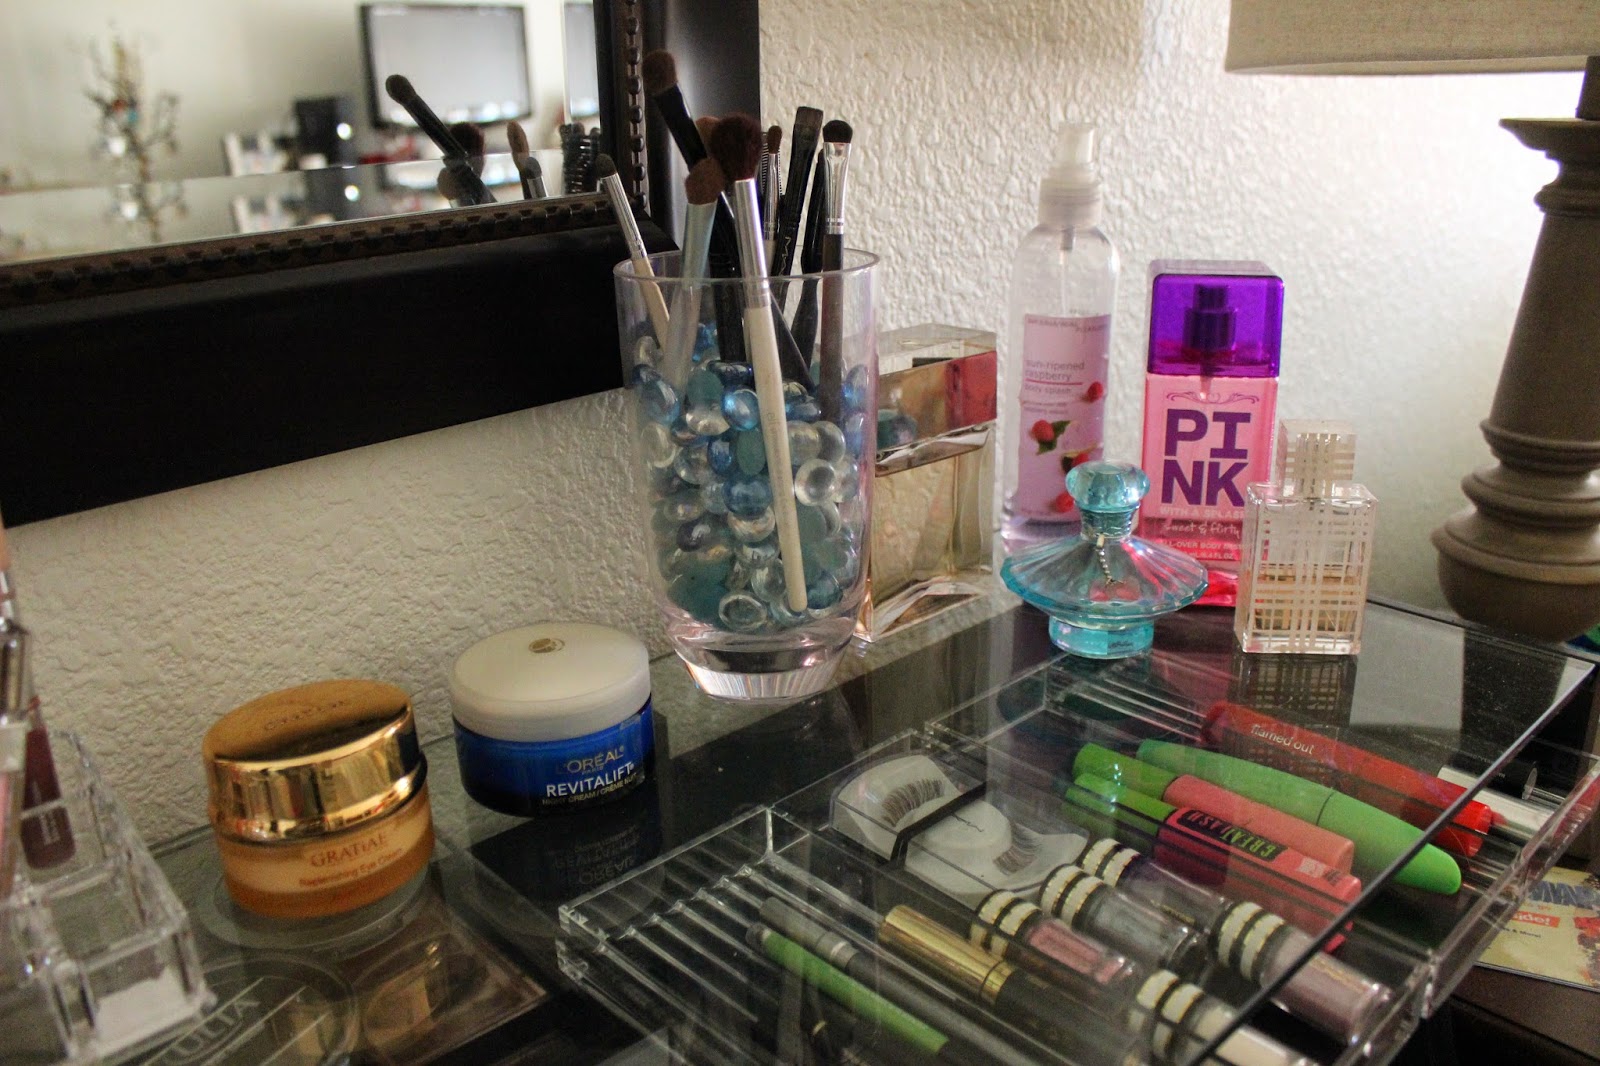
I got the cups and beads which hold my make up brushes at the dollar store!
The large bins on the left are two food storage containers which I found in the kitchen section of The Container Store. They're perfect to hold all of my nail polishes, make up remover wipes, face moisturizers, deodorant (yes I wear men's and I'm not ashamed!) and dry shampoo.
Top left: Food Storage Bins - $9.99 each // Top Right: Large Acrylic Trays - $14.99 //  Bottom Right: Flat Lipstick Tray - $6.99 // Bottom Right: Eyeliner Trays -$6.99 // Left Middle: Angled Lipstick Tray: $7.99

The long acrylic trays are pretty standard, but since the opening is less than an inch wide it was hard to find a container that would fit. I really didn't want to pay $15 per tray, but hey it looks great! The smaller trays are wonderful because they have little groves for each individual pencil and eyeliner stick!

IKEA DESK ASSEMBLY
Ikea Shelf (discontinued) -$19.99 // Ikea Lalle Legs - $12.50 // Triangle Shelf Support - $3.99
 I put the legs on the front (obviously) which left room for the triangle support shelves. I highly recommend these so you can put more weight on the shelf
Fully mounted to the wall 

I'm still SO obsessed with it! 

Do you have any DIY projects you're completely in love with?


Hosted by Life's A Party, Dress Like It & Pretty In Her Pearls
Life's A Party, Dress Like It (Follow on Bloglovin')       Pretty In Her Pearls (Follow on Bloglovin')

If you'd like to co-host Stylish Tuesday, please send an email to lifesapartydli@gmail.com!

This week's featured blogger is Londyn from Blog Fashion!
Can we just talk about how fabulous and chic she looks with her adorable baby bump?! The gold shift dress is great because it not only adds texture with the print, but has some stretch to it to not only keep her comfortable but looking incredibly sexy as well. I love how she paired the waist belt with it and added some fun studded heels! Awesome look love!

If you'd like to be featured on next week's Stylish Tuesday, then simply follow the rules below: 

1. Please follow me via Bloglovin' or GFC and this week's co-host Angela from Pretty In Her Pearls on Bloglovin'

2. Link up your favorite recent style post

Life's A Party Dress Like It

 Linking up with : Lauren

Wednesday, March 19, 2014

Jewelry Organization 101

Happy Wednesday Everyone! 

I know the holidays are well over but over my Christmas vacation I had a whooping 2 weeks off of work. Oh to have those glory days back! I'm all about lazy days watching Sex and the City marathons, but one day I decided to jump on Pinterest. As every girl knows once you log on there's no going back for a good 2-4 hours ... or is this just me?

 Hello my name is Paige (raises hand) and I'm addicted to Pinterest.

The first (and only) thing I searched for was a proper way to organize jewelry. Every girl has their own unique and cute way of doing it, but I couldn't figure mine out. My necklaces were hanging on a key hook from Bed Bath and Beyond, I had earrings in small dishes and my dresser was constantly looking like a hot mess with bracelets, rings and earring backs all over the place.

I immediately found some great ideas on my beloved Pinterest but wanted to make them Paige-esque.
Yes I just made up my own word and I'm sticking with it.
images via and via the other two weren't linked on Pinterest please let me know if it's yours!

I loved the white bowl and candlestick look but I'd lose everything in those bowls lets be real. The frame idea is great, I just don't have the wall space. I like the rod to hang necklaces on but think it would be a pain to actually get the one piece I wanted easily and lastly, this bracelet stack is serious eye candy but again would be a pain to get the bangle I'm after in a pinch.

After seeing these ideas and contemplating what I actually wanted to do I grabbed my handyman Dr. D and make a quick trip to the holy grail of organization: IKEA. We got our supplies and went to work. Take a look at the before and after shots of my chaotic mess turning into an organized dream.


Let's start with my handbags ... before they were on a hook I bought at Marshall's but the weight was overwhelming causing my bags to fall on the floor -- and one of the ends to fall off!
I bought a shelf at Ikea (details below) and it instantly made a huge difference!

My necklaces were on a key hook purchased from Bed Bath and Beyond. I loved the way they were displayed but since it only had 5 hooks I had at least 6-7 necklaces per hook.
These Ikea hooks (details below) made everything nice and neat with 2-3 necklaces per hook

I think displayed jewelry is a great substitution for art so I keep it on my dresser like this:
 I lost the cap to my favorite two sided lip stick so please excuse the ziploc bag!

Dresser Details:
Bracelet Bar: The Container Store // Earring Tree: Bed Bath & Beyond
Felt Divider Trays: Marshall's // Lipstick Acrylic Tray: The Container Store


Ikea Shelf Tutorial:
I bought the middle length shelf and the triangular wall mounts for additional weight support
In the upstairs kids playroom section were these hooks. The package didn't state what they were for but with them being double sided and featuring wide and narrow ends it was a great option for my handbags.
Ta Da, the finished look! All it took was screwing the hook plates into the shelf but man what a difference! I also love having the shelf to put my hats and clutches on


Necklace Hooks
:
These hooks were in the window treatment section. Normally the hook would face the front but I turned it to the side to have easier access to my statement pieces
The wall mount could be put on the short side (as shown) or the long side (holding the hooks) I chose the short side to give more room for the hooks. As shown on the right side the hooks are facing outwards in a rotating fashion to make it easier to find the necklace I want to wear


What ways do you store your jewelry? I'd love to hear them!